Grounded study chat
Chat over uploaded course documents with task-aware retrieval and weighted document priorities.
 UACRAgent
v0.4.0 · desktop-first · local-trusted API
UACRAgent helps students chat over class materials, reuse persistent study sessions, and generate structured review artefacts only when they actually need them.
What it does
The current version is centered on guided course review through a persistent assistant workflow, with document generation available as a strong secondary tool.
Chat over uploaded course documents with task-aware retrieval and weighted document priorities.
Generate review summaries, practice booklets, mock exams, and exam predictions when you ask for them.
Desktop sessions, CLI runs, and API runs each keep their own predictable managed workspace roots.
Use Gemini, OpenAI, or DeepSeek for chat and generation, with cloud or local embeddings depending on your setup.
Attach files via the + button, paste (Cmd/Ctrl+V), or drag-and-drop. Choose effort level, reasoning mode, web search, export format, and session-specific settings from the GUI.
Chroma vector indexes stay on your machine, and unchanged workspaces can be reused across session reloads.
How it works
Add syllabi, lecture notes, textbooks, assignments, past exams, and other files in the interface that fits your workflow.
Each document type uses a different chunking strategy so retrieval matches the structure of academic material more closely.
Chroma stores local vectors and the assistant retrieves weighted context for chat or study-document generation.
Ask grounded questions, request study artefacts, reopen sessions later, and reuse existing indexes when files have not changed.
Interfaces
The primary interface for most users.
A terminal-first study assistant.
cli_run/Programmatic one-shot generation for trusted local use.
api_run/markdown_path responsePrivacy
<app_data_dir>/logs/
The current API is intended for local trusted use only. If you use the
FastAPI layer, set UACRAGENT_ALLOWED_BASE_DIR when you want an
extra local filesystem boundary.
Get started
Most users should start with the packaged desktop app. Use the source install only if you want development control, the CLI, or the local API.
.exe) or portable zip..env.sample to .env, then add your provider/API settings.python3 -m venv .venv
source .venv/bin/activate
pip install -r requirements.txt
pip install -e .
cp .env.sample .env.env.sample to .env.py -m venv .venv
Set-ExecutionPolicy -Scope Process -ExecutionPolicy Bypass
.\.venv\Scripts\Activate.ps1
pip install -r requirements.txt
pip install -e .
copy .env.sample .envpython -m uacragent --guipython -m uacragent your_file.pdf --course-name "Your Course Name"
uvicorn uacragent.api.main:app --reloadAPI Keys
UACRAgent needs an API key from at least one AI provider to power its chat
and document generation. The key must be entered in App Settings each time
you launch the app — it is only stored in memory while the app is running and
is never written to disk. To skip this step on future launches, you can save
the key in a .env file (see the optional guide below).
Follow the steps for the provider you want to use.
💡 Not sure which provider to pick? Start with Google Gemini — it has a generous free tier, requires no credit card to try, and works well for all of UACRAgent's study features. Note that the free tier's rate limits are suitable for light, demo-scale tasks; for regular daily use or larger class loads, a paid plan is recommended.
Accessed through Google AI Studio. No billing setup needed for the free tier. Sign in with any Google account.
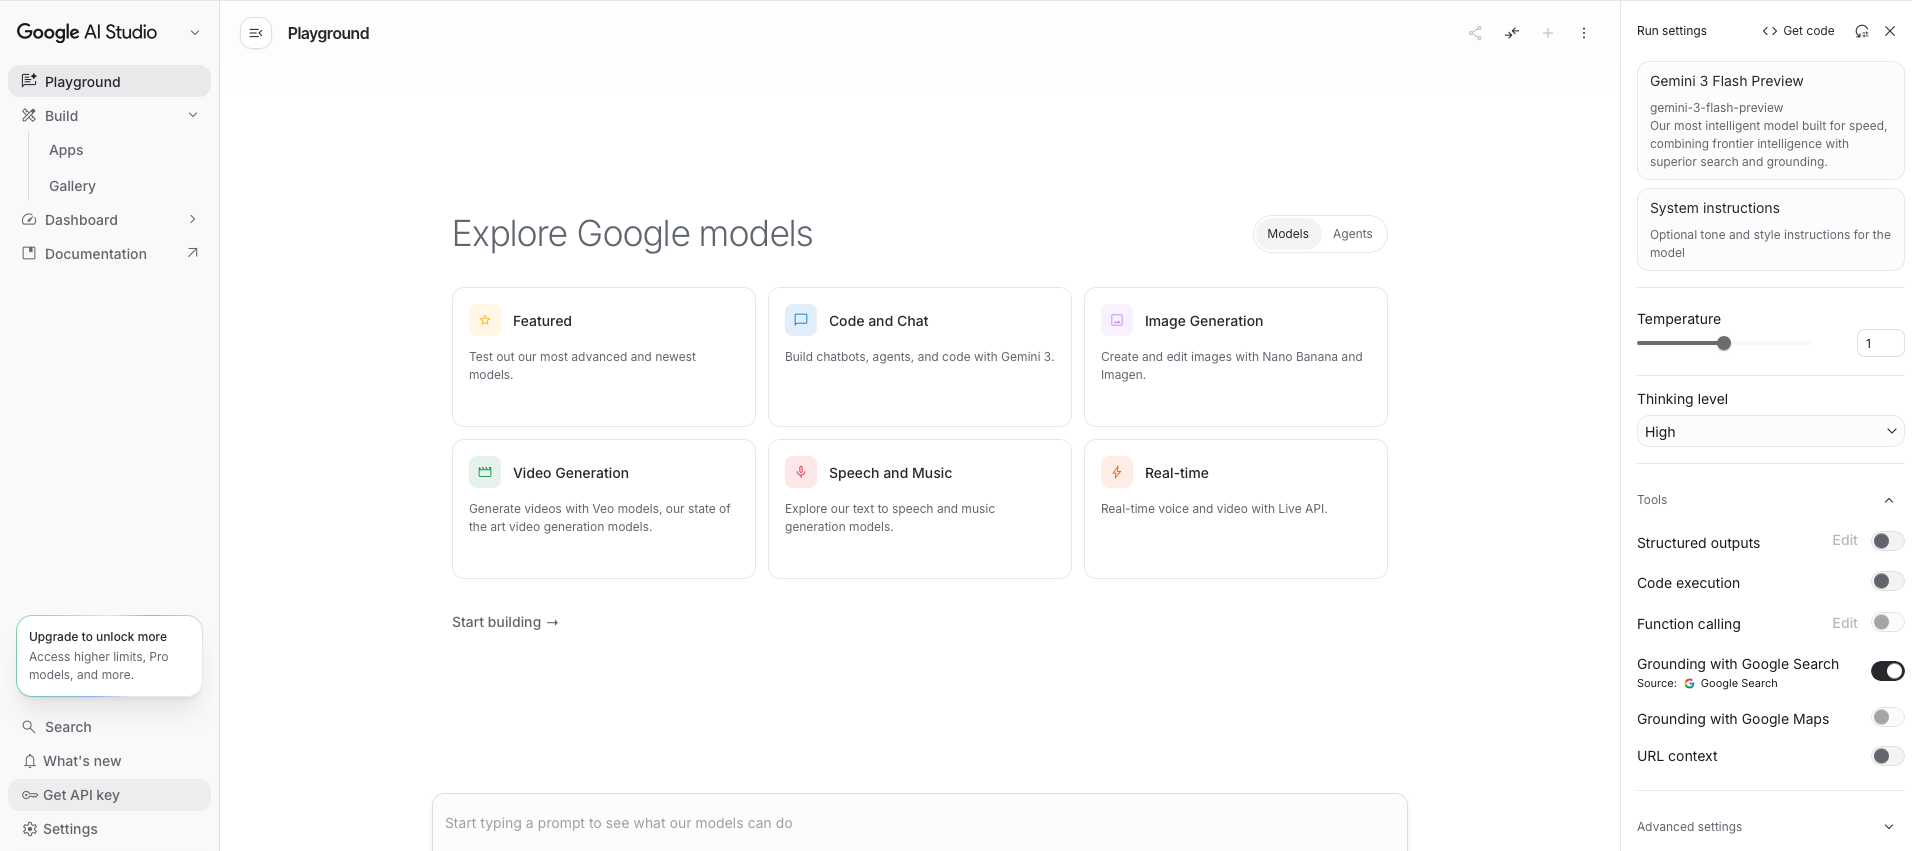
AIza.
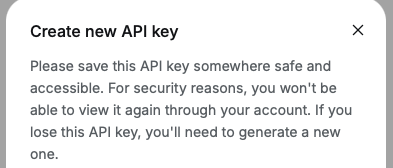
Click the copy icon to copy it.
Accessed through the OpenAI Platform. Requires adding billing credit before use. The same account used for ChatGPT can be used here.
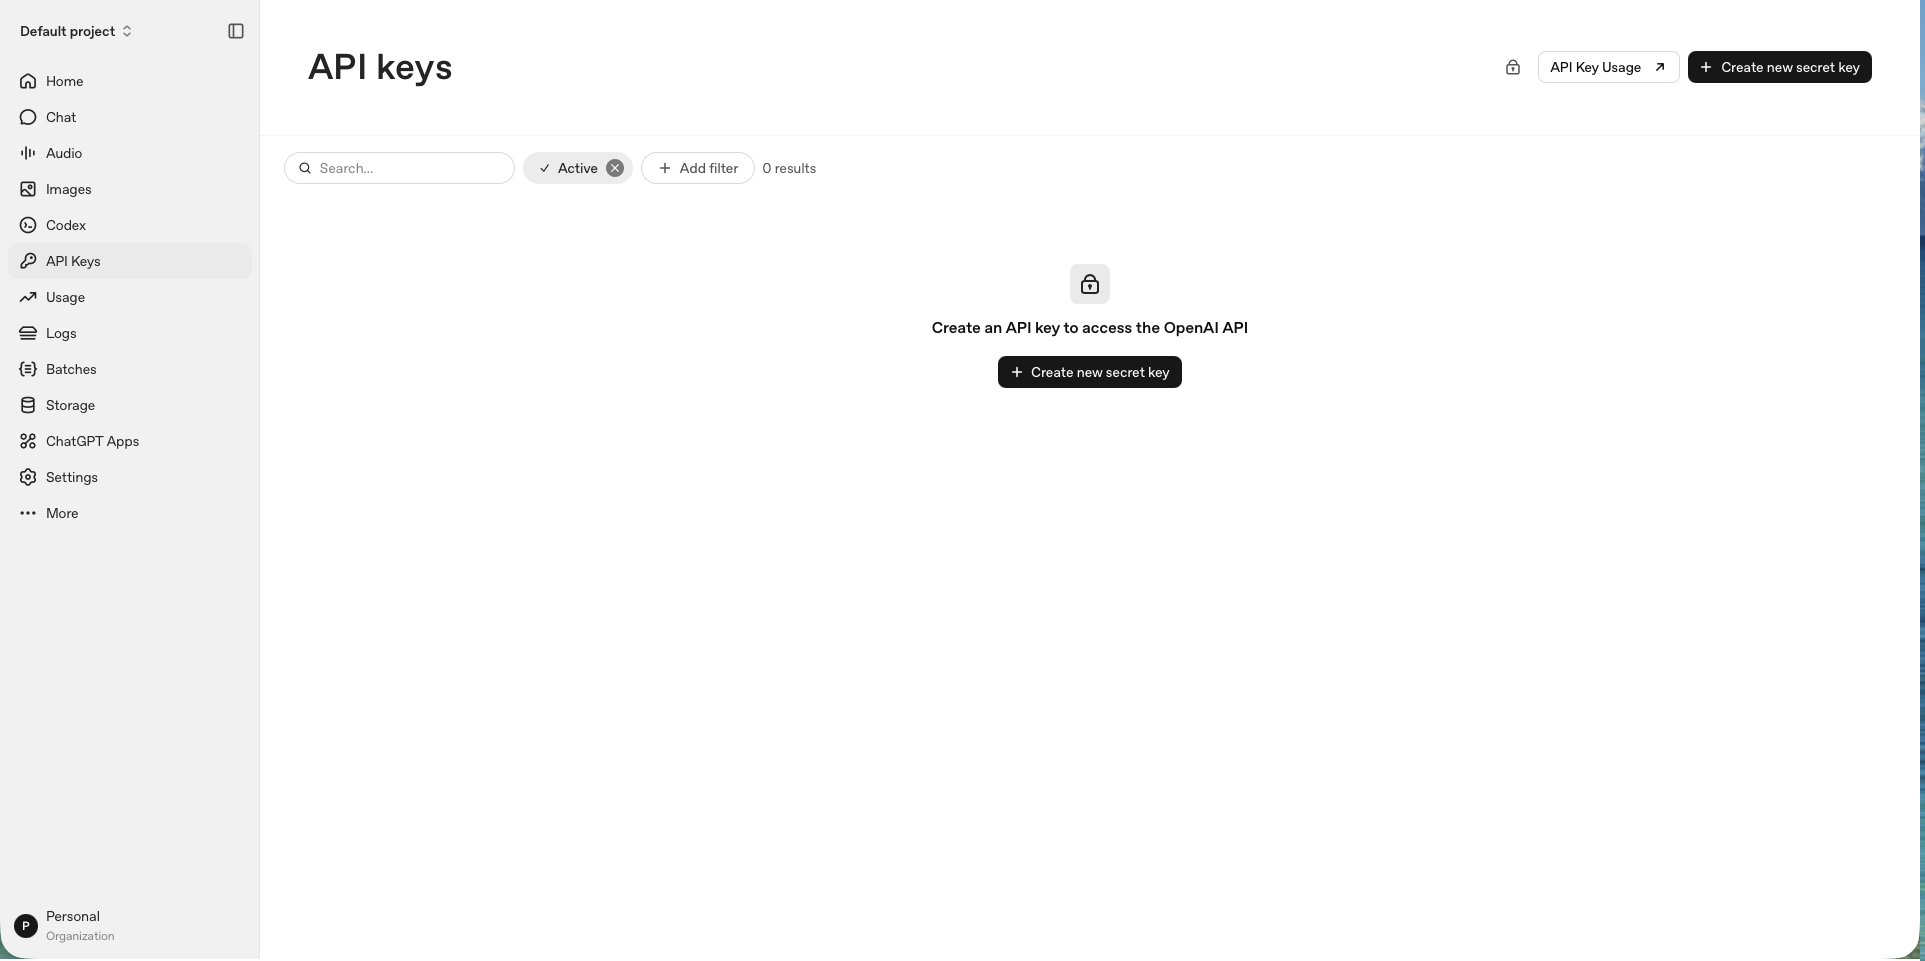
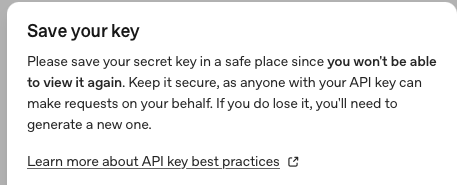
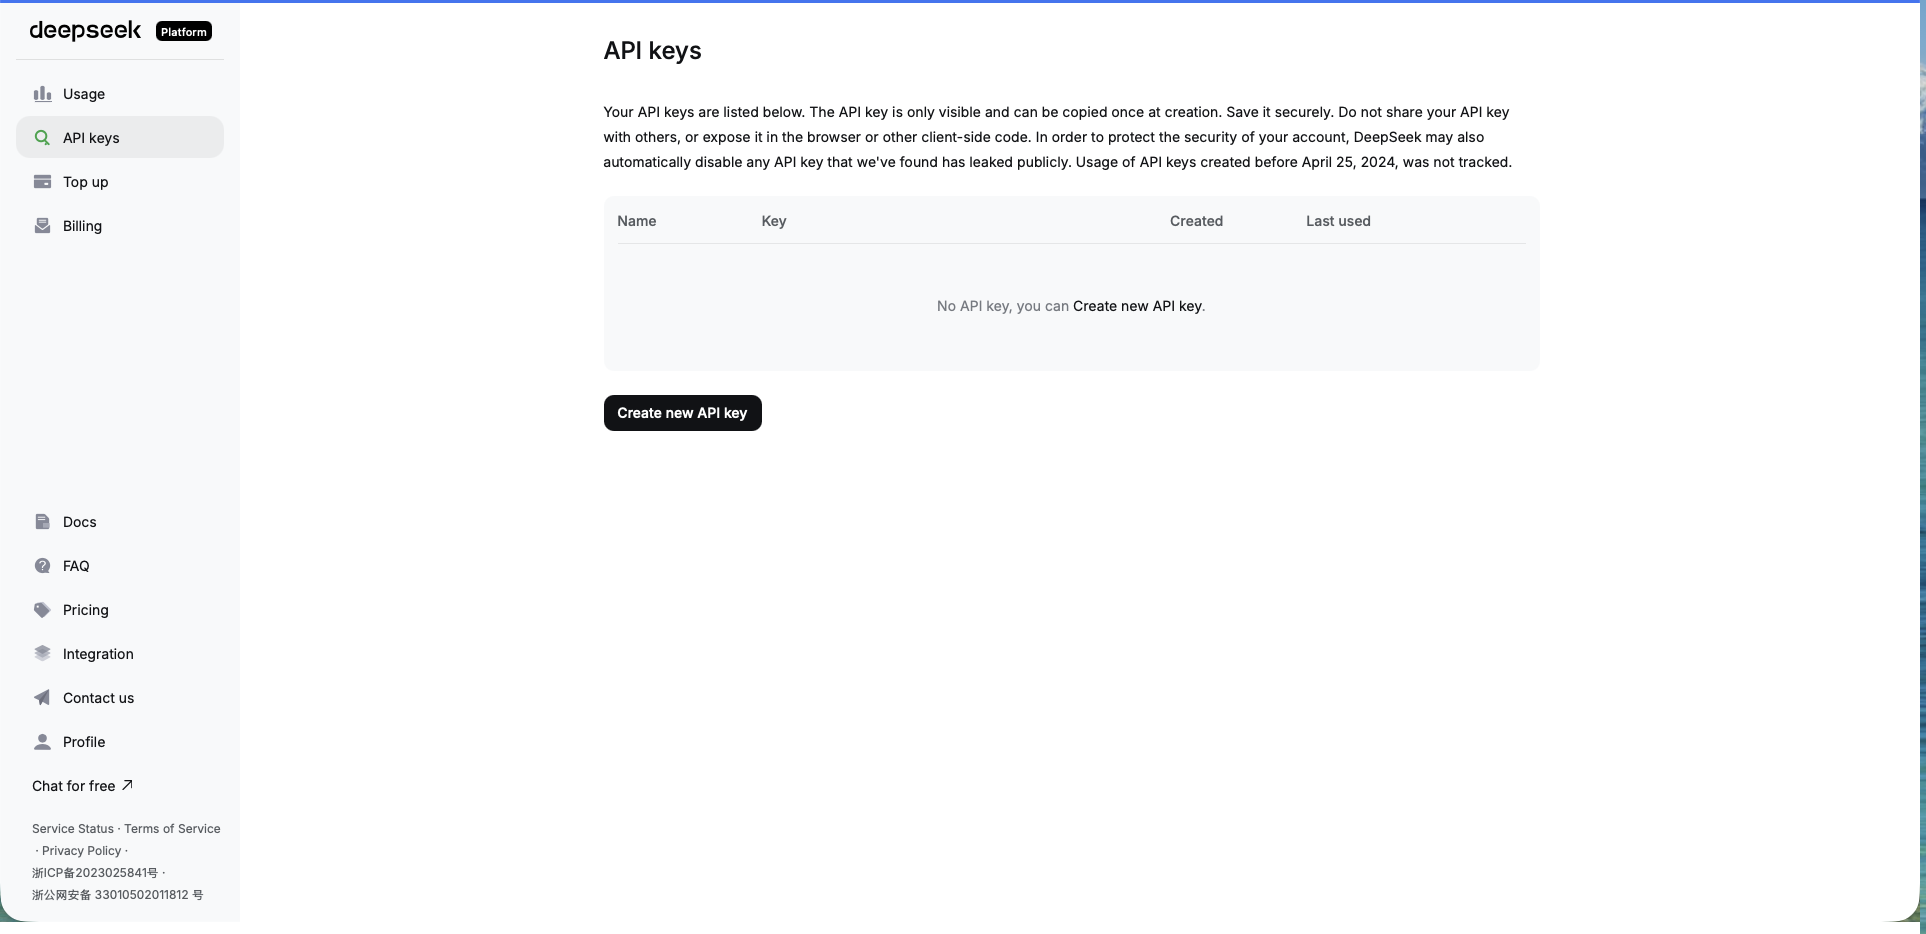
Accessed through the DeepSeek Platform. Very low cost per token compared to other providers. Note: DeepSeek does not support image vision inputs — text-only chat and document generation only.
This is optional — you can always enter your API key manually in App Settings → Provider tab each time you launch the app. If you prefer not to set this up, skip this section entirely.
If you do set it up: UACRAgent reads a configuration file called .env on startup and pre-fills your API key automatically. Set it up once and the app is ready every time you open it — no copy-pasting needed.
Where the file lives
The file goes inside a folder called .uacragent in your personal Home folder — the folder with your name on it. The full path looks like this:
macOS  :  /Users/YourName/.uacragent/.env
Windows:  C:\Users\YourName\.uacragent\.env
Both the .uacragent folder and the .env file start with a dot (.), which makes them hidden by default on macOS and Windows. That is intentional — it keeps app files tidy and out of sight. The steps below show how to reach and create them without any developer tools.
What to write inside the file
# Google Gemini
GOOGLE_API_KEY=AIzaSy...your-key-here

# OpenAI
OPENAI_API_KEY=sk-...your-key-here

# DeepSeek
DEEPSEEK_API_KEY=sk-...your-key-here
Replace the placeholder with your actual key. Only add the line for the provider you use — you do not need all three.
.uacragent folder automatically inside your Home folder.
# Google Gemini
GOOGLE_API_KEY=AIzaSy...your-key-here

# OpenAI
OPENAI_API_KEY=sk-...your-key-here

# DeepSeek
DEEPSEEK_API_KEY=sk-...your-key-here.env (delete the current name and type .env, starting with a dot).
.env file into the .uacragent folder. Open a Finder window (click the smiley-face icon in your Dock). In the Finder menu bar, click Go → Go to Folder, then type the path below and click Go:
/Users/YourName/.uacragentReplace YourName with your Mac username. Don't know it? Click the Apple menu (top-left) → System Settings → click your name. Your username is the shorter name shown below your full name.
.uacragent folder is now open in Finder. Drag the .env file from your Desktop into this Finder window. (The Desktop is visible in the background — drag the .env icon from there directly into the open folder.)
.uacragent folder automatically inside your user folder.
# Google Gemini
GOOGLE_API_KEY=AIzaSy...your-key-here

# OpenAI
OPENAI_API_KEY=sk-...your-key-here

# DeepSeek
DEEPSEEK_API_KEY=sk-...your-key-here.txt and UACRAgent will not read the file..env (starting with a dot, nothing after). Click Save.
.env file into the .uacragent folder. Open File Explorer (click the folder icon in your taskbar). Click the address bar at the top so it becomes editable, type the path below, and press Enter:
%USERPROFILE%\.uacragent%USERPROFILE% is Windows' built-in shortcut for your personal user folder — for example C:\Users\John if your username is John.
.uacragent folder is now open in File Explorer. Go back to your Desktop, right-click the .env file → Copy. Then click inside the File Explorer window and right-click an empty area → Paste.
🔒 Security reminder: treat your API key like a password. NEVER share it, NEVER paste it into a chat, and NEVER commit it to a public repository. If a key is accidentally exposed, delete it from the provider dashboard immediately and create a new one.
UACRAgent is an independent open-source project. Thanks to everyone who helped make it better.
Thanks to the volunteer test users who helped exercise the desktop assistant, retrieval flow, workspace handling, and study-support UX during development. Their feedback helped shape the agent into what it is today.
UACRAgent stands on the shoulders of many excellent open-source projects. Key components include:
The following providers power UACRAgent's language and embedding models:
UACRAgent is not affiliated with, endorsed by, or officially connected to any of these providers.